How to set up Workflow Email Templates
What is the Workflow Engine for Automated Emails
Meeting Hub Pro customers can configure automated Workflow sequences that automatically send email notifications at specified times. For instance, you can schedule reminder emails to go out before a client’s booking. These reminders ensure your customers receive timely notifications—enhancing engagement and reducing no‑shows.
To set this up, users define:
- Trigger timing – e.g., 24 hours before booking start time
- Workflow action – sending a tailored email reminder
- Conditions – customise the conditions on when the email is sent - before or after the booking or transaction date.
By automating reminders, you streamline communication and improve the customer experience, all with minimal manual effort. Workflows run on a regular bases throughout the day.
How to set up Booking Workflows
The first step in the process is to set up the Email Templates that will be used in the Workflow. Meeting Hub can share a base line template with you to get you started. Workflow templates can be set up for the following scenarios:
- Booking reminders - to remind your bookers about upcoming bookings
- Security Bond requirements - to provide Security Bond payment details to your bookers
- Space Access instructions - to provide site / space access instructions to your bookers
- Thank you for booking - to thank your bookers for booking with you
Once your Workflow emails have been set up you can then configure the Workflow for the Email Template.
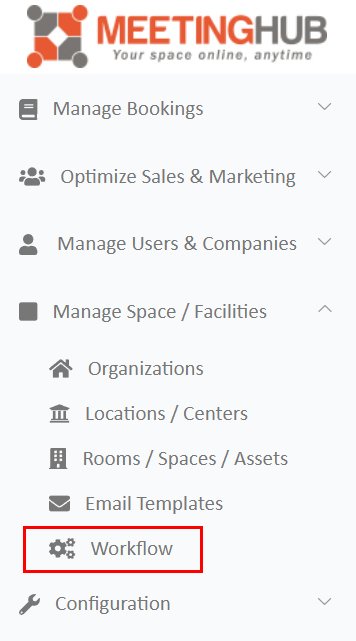
From the Admin Panel, select Manage Space / Facilities > Workflow.
Configuring the Workflow
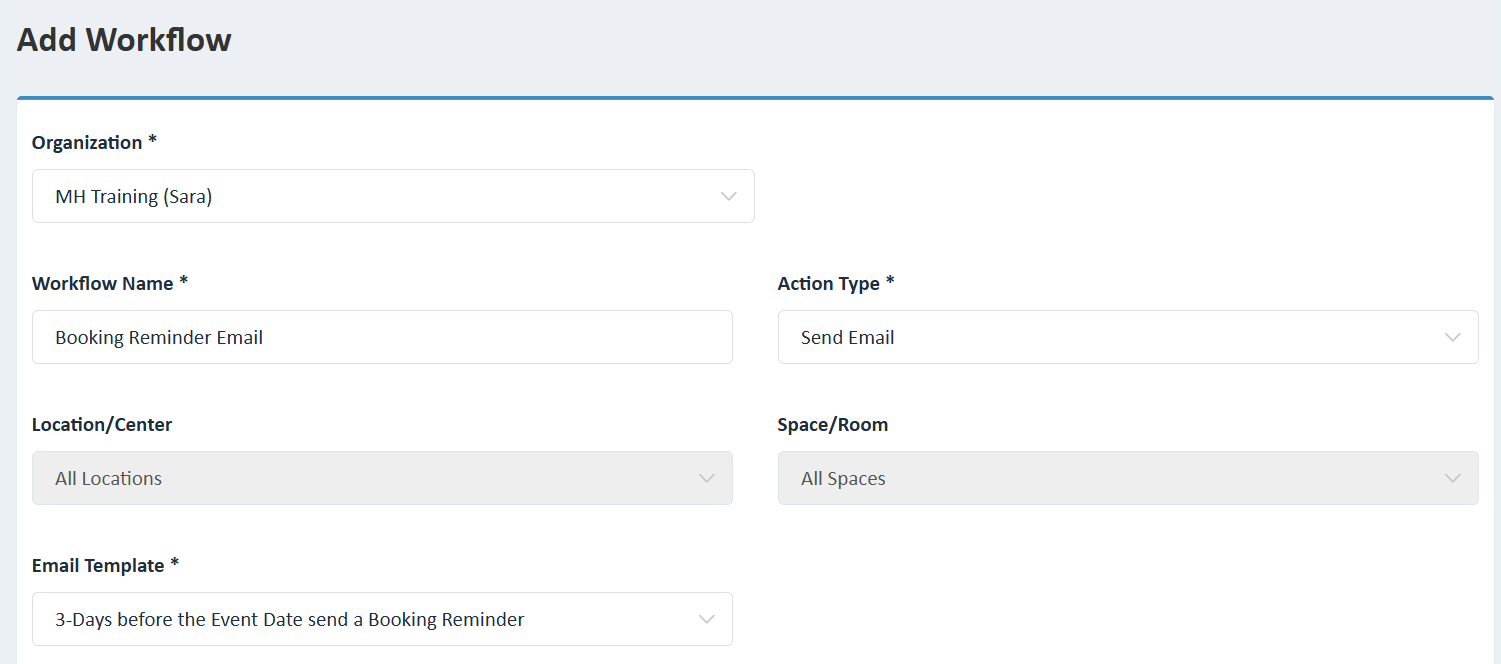
To configure the Workflow for your selected email template you need to complete the mandatory fields. All fields marked with an * are mandatory fields. Lets review the mandatory fields:
- Name your Workflow based on the type of email you are creating the Workflow for, for example "Booking Reminder Email".
- Select the required Action Type: "Send Email"
- Select the Email Template that was created for this Workflow.
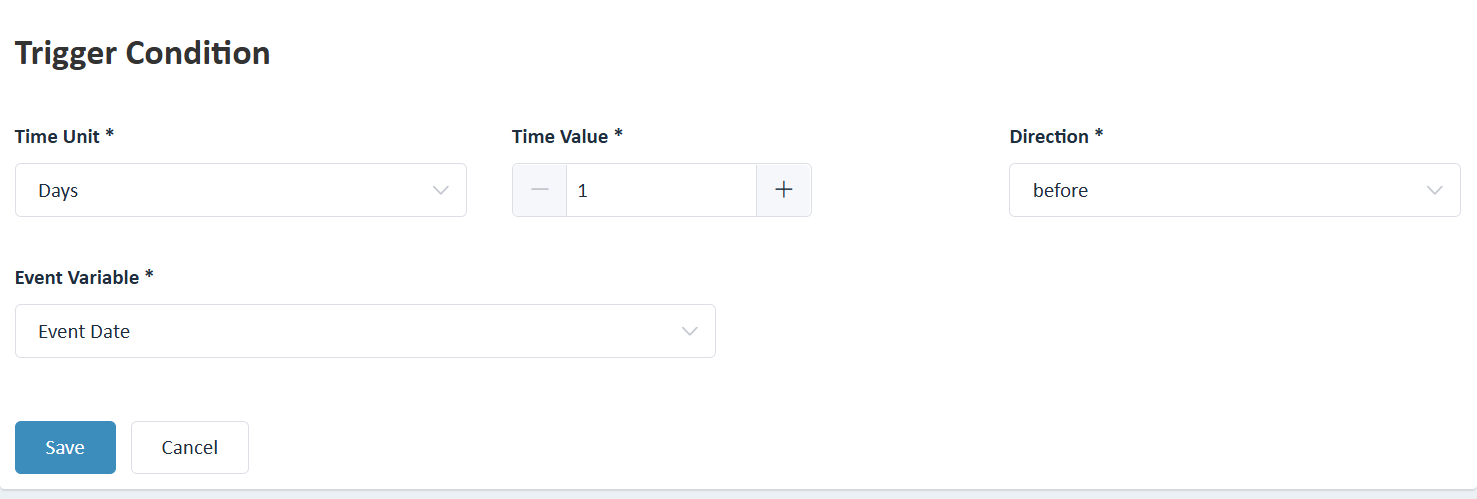
- Add the trigger conditions:
- Time Unit: Minutes, Hours or Days
- Time Value: E.g. 1 - this would be either 1 Minute, 1 Hour or 1 Day
- Direction: Before or After (that is before or after the booked event.
- Event Variable: Event Date or Transaction Date (that is the date of the booked event or the date that the booking was made).
Finally, click Save to ensure your created Workflow is saved.
After setup, the workflow engine will handle everything automatically—freeing you from manual reminders and ensuring consistent, timely communication.
Automating these sequences means smoother operations, happier customers, and fewer missed appointments.