How to set up different User Types (Permissions)
Meeting Hub allows for the configuration of different User Types for your Organization
Meeting Hub Users are the individuals associated with your Organization (your own employees) and the Companies (Clients) that book your Spaces. When a User is created, they are linked to a permission set (User Type), which determines the access level they have to Meeting Hub. Upon creation, Users are automatically assigned as a 'Basic' User (permission type) which can be edited as required. In addition to Basic Users (your Bookers), there are also two other User Types:
- Administrator - those that have full access to your Organization settings, including all financial settings
- Customer Service Representative: those that can manage bookings bot not make Organization setting changes.
In the YouTube video above you will learn the simplest way to create new Users for your Organization and update their User Type from a Basic User if required. Otherwise, follow the instructions below:
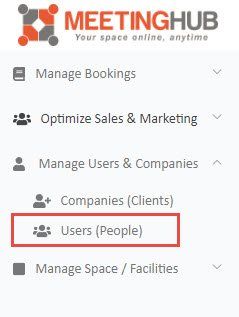
Users can be found on the navigation menu from Manage Users & Companies > Users (People).
List Users
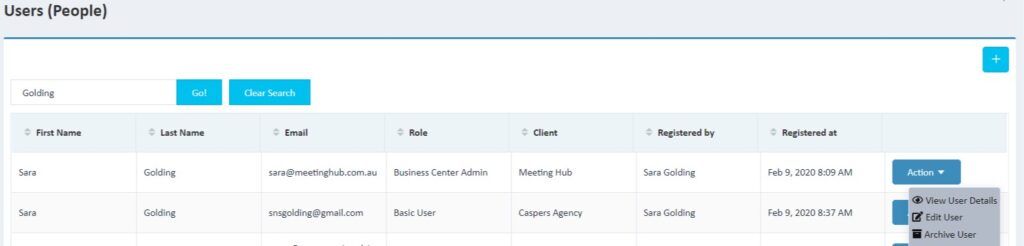
The Users list displays from the Users (People) menu, showing all Users currently set-up within Meeting Hub for your Organization. From this User List, you can search for a User by First Name or Last Name. The Action Button enables you to View User Details, Edit Users and Archive Users.
Add User
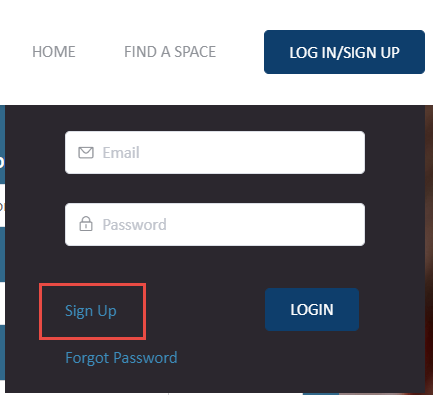
The simplest way to add a user is to 'Sign Up' from the Meeting Hub Home Page. First click on Login/Sign Up followed by Sign up. Complete the details on the form. Remember fields that contain an asterisk are mandatory.
When a User signs up (or is signed up) from the Home Page, a Company (Client) is created at the same time. This reduces the steps required to create a User and Company from within the application. Once a Company (Client) has been created, when registering another User for that Company, after entering the first four digits of the company name, a list will present with all companies already set up with those digits so that you can choose which company the user belongs to. The User will then inherit all attributes set up for that Company, such as discounts, gratis minutes and payment method.
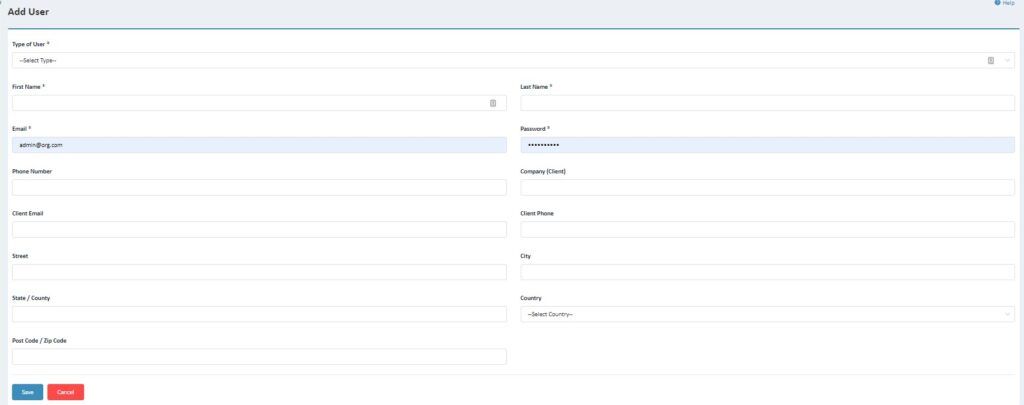
Users can also be added from the Users (People) menu option by clicking on the plus button. All fields marked with an asterisk must be completed. The remaining fields are optional.
New Paragraph


Copyright Ⓒ 2021 Meeting Hub. All Rights Reserved