How to 'blackout' your spaces to prevent taking room bookings on a particular day or days
How to prevent taking bookings during closed periods
Blackout periods are designed to prevent all spaces within your Organization or a particular space from being booked by your customers. A typical use case may be the Christmas period or during renovations when your premises or spaces are closed. The video above guides you through how to set up Blackout periods for your organization.
Blackout Periods for the entire Organization
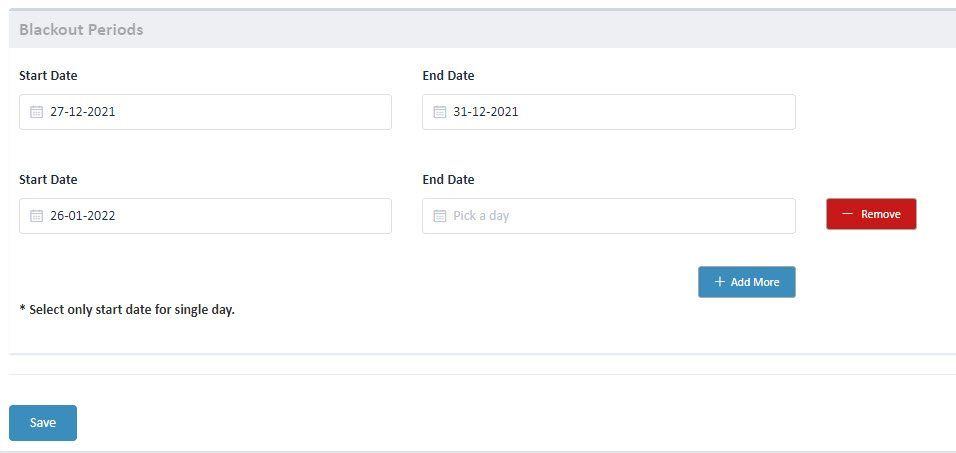
Setting a blackout period at the Organization level will mean that 'all spaces' within the organization will not be available for bookings. To set a single date or date range that you wish to 'black out' for bookings, navigate to Manage Space / Facilities > My Organization Settings. Scroll to the bottom of the page where you will see 'Blackout Periods'.
To 'Blackout' a date range, enter a Start Date and an End Date. All spaces will be unavailable for bookings, inclusive of the entire period. To 'Blackout' a single day, simply enter the Start Date. To 'Add More' 'Blackout' dates or date ranges, click the 'Add More' button. You can add up to 20 'Blackout' Dates. If you wish to remove a 'Blackout' date, click the 'Remove' button next to the date range.
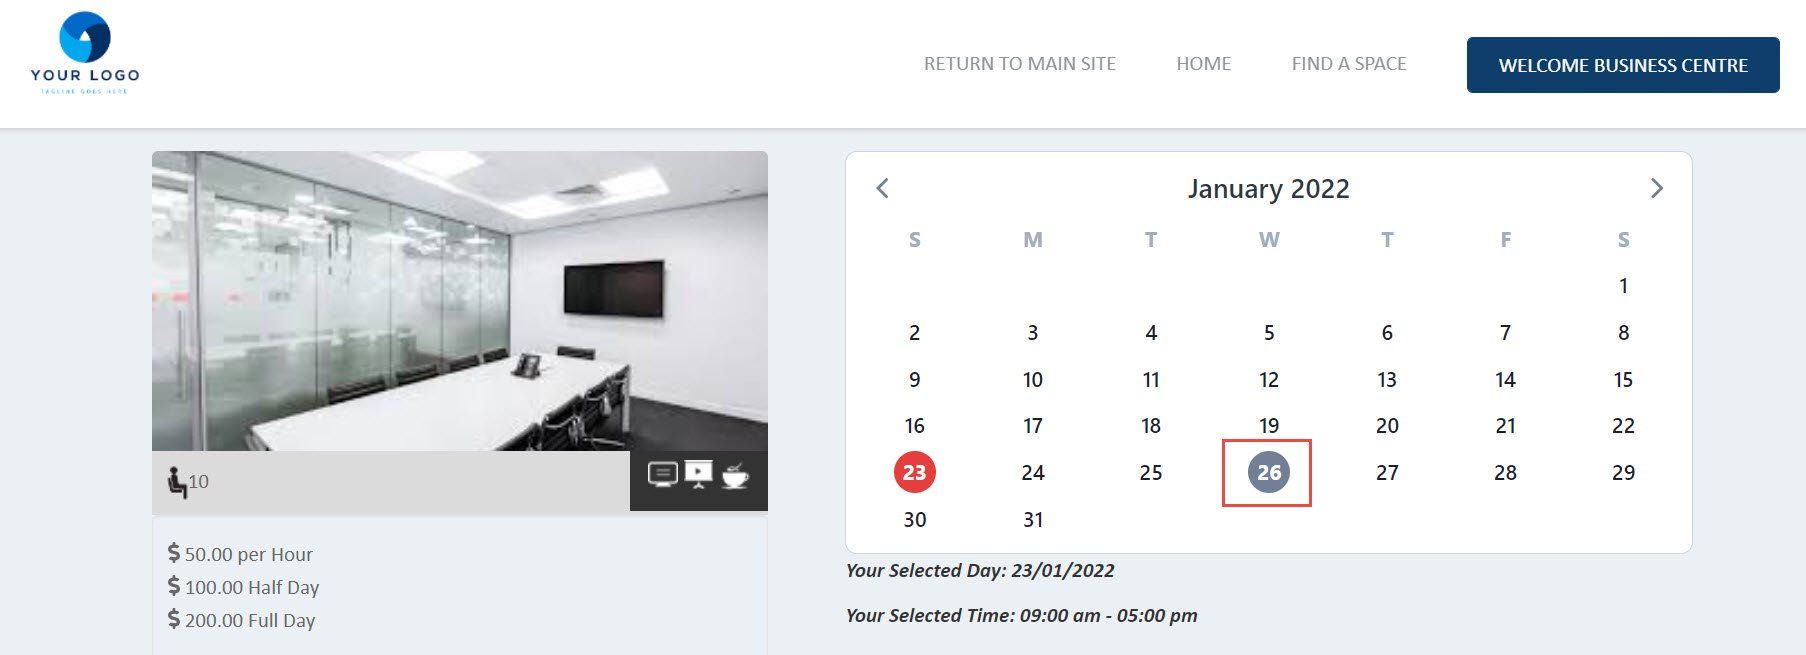
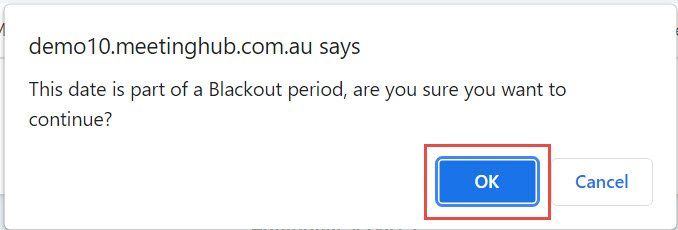
BC Admin and CSR Users are able to override Blackout period settings. Blackout periods are displayed on the Space Landing pages for BC Admin and CSR with a grey circle around the date. If BC Admin or CSR Users do book a space during a blackout date a pop up will appear confirming that you want to proceed. Blackout period dates can be overridden on the Organization Settings or Space Settings with new dates if required.
Setting a Blackout Period for a particular Space
Should some of your spaces have for example a regional holiday that does not apply to the whole organization you can set a blackout period at the Space Level.
From Manage Space / Facilities > Rooms / Spaces / Assets, scroll to the bottom of the page to the 'Blackout Periods' section. To 'Blackout' a date range, enter a Start Date and an End Date. The selected spaces will be unavailable for bookings, inclusive of the entire period. To 'Blackout' a single day, simply enter the Start Date. To 'Add More' 'Blackout' dates or date ranges, click the 'Add More' button. You can add up to 20 'Blackout' Dates. If you wish to remove a 'Blackout' date, click the 'Remove' button next to the date range.
What will my customers see when spaces have been set to 'Blackout'?
When your customers try to book a space with 'Blackout Periods' set, the dates not available for bookings will appear 'greyed out' as shown in the screenshot below.

Should a customer enter a date in their search criteria where a space or spaces have been blacked out, those spaces will not be returned in the search results.
Blackout Periods is available on the following Meeting Hub Packages:
- Pro
- Enterprise